This post will cover creating a second encrypted drive on Fedora that automatically decrypts on boot and mounts to a set location.
I had finally run out of room on my SSD. I went to the store to buy another so I could increase the amount of storage space in my PC. I got home and installed it. Then I thought.
My main drive in encrypted and setup by the Fedora installer, so my second should be too right? It only makes sense. Why have some data encrypted and the rest out in the open.
When setting up the second drive, we're going to try to closely copy what Fedora does by default when it creates an encrypted drive. It also gives us a lot of flexibility as you'll see soon.
What we're going to setup is called a LVM-on-LUKS configuration. LUKS is the Linux Unified Key Setup, the standard way Linux installations encrypt drives. LVM is the Linux Logical Volume Manager. This lets us create logical "devices" that we can place on top of the encrypted drive and partition as we please, without having to re-partition the hardware. By placing LVM on top of LUKS, our drive will just look like a single encrypted partition from the outside, but once unlocked, can contain many partitions. Even if we only want to create a single partition right now, this is a one-time setup that gives us the flexibility to partition the drive as we like in the future without having to setup the encryption again.
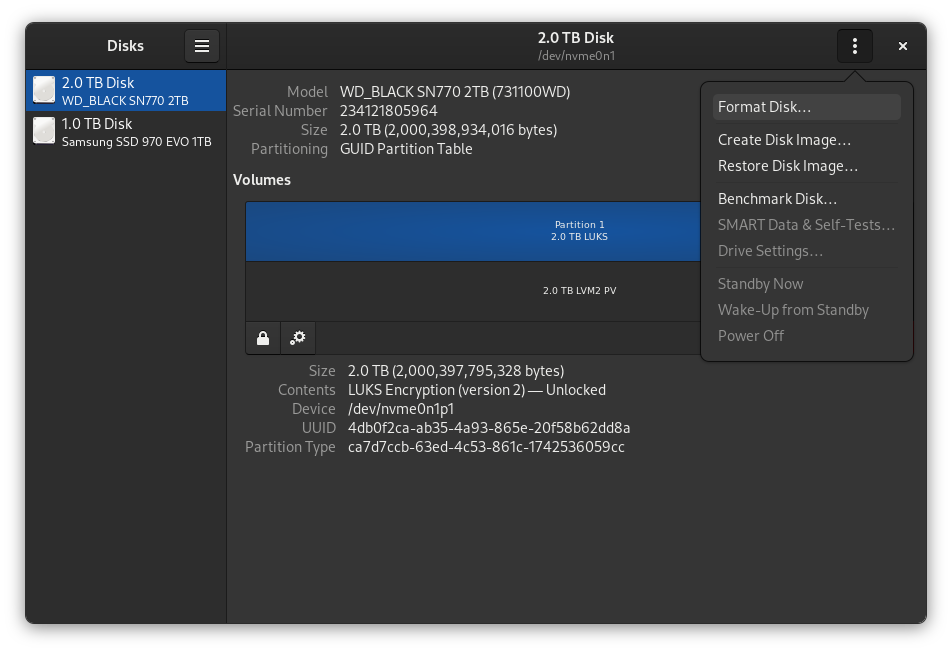
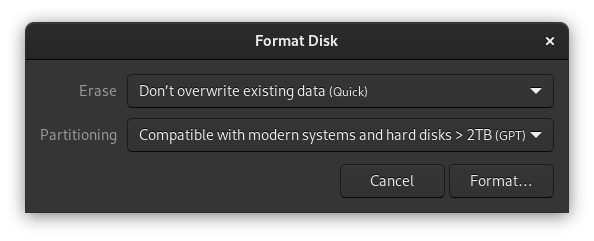
To start the new SSD is completely blank, so we're going to have to give it a GPT partition table. This can be done in the gnome Disks utility by clicking on the drive, then clicking the three dots in the top corner, and then "Format Disk". After that you'll want to choose the GPT partitioning system.


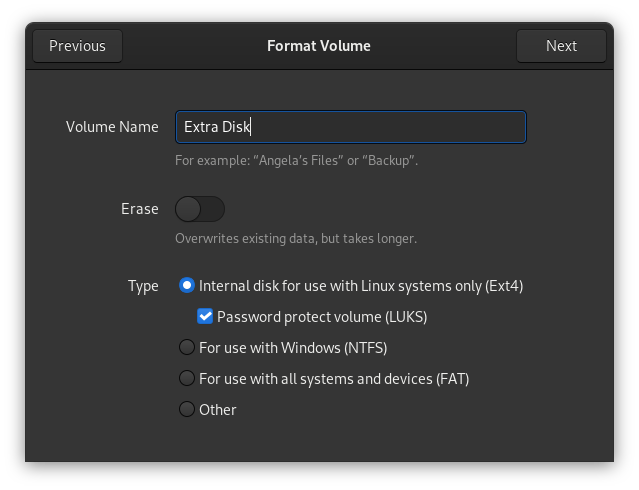
Now we're going to create the encrypted LUKS layer. This can be done in Disks as well. We're going to click on the + icon to create a new partition. It should use all the space by default, click next. We're then going to give the volume a name and select the Ext4 option and check the LUKS box, click next.

This is important, give the new drive the same password as your boot drive. This will let you unlock both at the same time at boot. Click create.
To get our system to decrypt this drive on boot, we're going to have
to add it to the /etc/crypttab file. This file contains a list of
encrypted drives to setup that need to be setup during the boot
process.
There should already be a line in there for our existing boot drive. We want to add a similar line for our new device. To create the new entry we need two pieces of information from Gnome Disks. We need the hardware partition UUID, and the name of the decrypted partition.
To get the hardware partition UUID, click on the upper layer of the
partition in the device view. The UUID should be in the details in the
underneath. To get the name of the decrypted partition, click on the
lower half. In my case, the name of the encrypted partition is
/dev/mapper/luks-<UUID of the disk>. We're interested in only the
part that follows /dev/mapper/.
We then add the new line to our /etc/crypttab file. It should look
like this, ignoring the arrow and comment that follows it.
luks-XXXXXXXX-XXXX-XXXX-XXXX-XXXXXXXXXXXX UUID=XXXXXXXX-XXXX-XXXX-XXXX-XXXXXXXXXXXX none discard <- Our original boot drive
luks-YYYYYYYY-YYYY-YYYY-YYYY-YYYYYYYYYYYY UUID=YYYYYYYY-YYYY-YYYY-YYYY-YYYYYYYYYYYY none discard <- Our new drive
The beginning of the line is the name of the decrypted partition,
followed by UUID=<hardware uuid>, the hardware partition UUID. The
word none tells LUKS that we are not using a keyfile. The word
discard here is a mount option that improves the efficiency of SSDs,
it's meaning is covered in the crypttab man page.
Now that our encryption is taken care of, we need to setup the partitions.
LVM is split up into three layers. The physical volume layer, the volume group layer, and the logical volume layer.
The physical layer represents actual hardware drives. The volume group layer represents a "pool" of one or more drives that we can carve up however we please, creating volumes out of the total available space as though it's a single drive. The logical volume layer is made of the new virtual devices that the OS sees after we've divided the volume group layer.
LVM is setup like this because it lets you create RAID configurations and logical partitions that span multiple physical disks. We aren't interested in all of these features right now, but we must go through the process all the same.
First we need to create a physical volume from the decrypted LUKS
partition. We use the pvcreate command alone with the LUKS partition
device file from Gnome Disks.
sudo pvcreate /dev/mapper/luks-YYYYYYYY-YYYY-YYYY-YYYY-YYYYYYYYYYYYIf it asks you about overwriting an ext4 partition, that is okay. Gnome Disks created an ext4 partition that we are going to overwrite. Just be sure it's the correct drive before confirming.
Next we're going to create a volume group from that physical volume.
We use the vgcreate command for that. We need to come up with a name
to represent this "pool", I just use data_drive.
sudo vgcreate data_drive /dev/mapper/luks-YYYYYYYY-YYYY-YYYY-YYYY-YYYYYYYYYYYY
Finally we need to create the logical volume that we're going to be
formatting with ext4. In my case I only want a single partition at the
moment, but may decide to shrink the partition and split it up
differently in the future. Since I only want a single partition for
now I'll use 100% of the available space. We create logical volumes
using the lvcreate command.
sudo lvcreate -l 100%FREE data_drive -n data
The name of this logical volume is data.
The arch wiki also suggested that you leave at least 256M of extra
space so you can run e2scrub in case you want to check the
filesystem metadata.
sudo lvreduce -L -256M data_drive/data
Our logical volumes can be resized and the underlying storage used to
create new logical volumes at any time in the future using the lv*
commands.
Our new logical volume should now be available at either
/dev/data_drive/data or /dev/mapper/data_drive-data and ready for
partitioning.
If you want to see what the LVM volumes look like, you can inspect
them using pvs and pvdisplay for the physical volumes, vgs and
vgdisplay for the volume groups, and lvs and lvdisplay for the
logical volumes.
Now we'll create our ext4 partition.
sudo mkfs.ext4 /dev/data_drive/dataAt this point the new logical volume is prepared and ready to be mounted.
For this I chose the location /mnt/data, but you can mount the drive
wherever you deem appropriate.
sudo mkdir /mnt/data
sudo mount /dev/data_drive/data /mnt/data
If we want to make sure the system automatically mounts the drive at
boot, we can add it to our /etc/fstab.
We can add the following line to the bottom of the /etc/fstab file.
/dev/mapper/data_drive-data /mnt/data ext4 defaults,x-systemd.device-timeout=0 1 2
The first column is the name of the device we want to mount. The
second column is the location we want to mount it. The third column is
the filesystem on that device. The fourth column is contains the mount
options we want to use, and the fifth and sixth columns are the dump
and fsck order. You can read about what they do in the fstab man
page.
Now everything should be setup and ready! The drive should unlock when you type your password at boot and automatically mounted to the correct location.